
Installation Guide
Installed in 15 minutes.
Every step, photographed on a real car. No drilling, no specialist tools, fully reversible.
Stand behind the car facing the trunk. “Left” and “right” below are from this position. If a camera lens is inside the BMW roundel’s black ring, stop—HALO cannot be mounted there unless the camera is relocated.
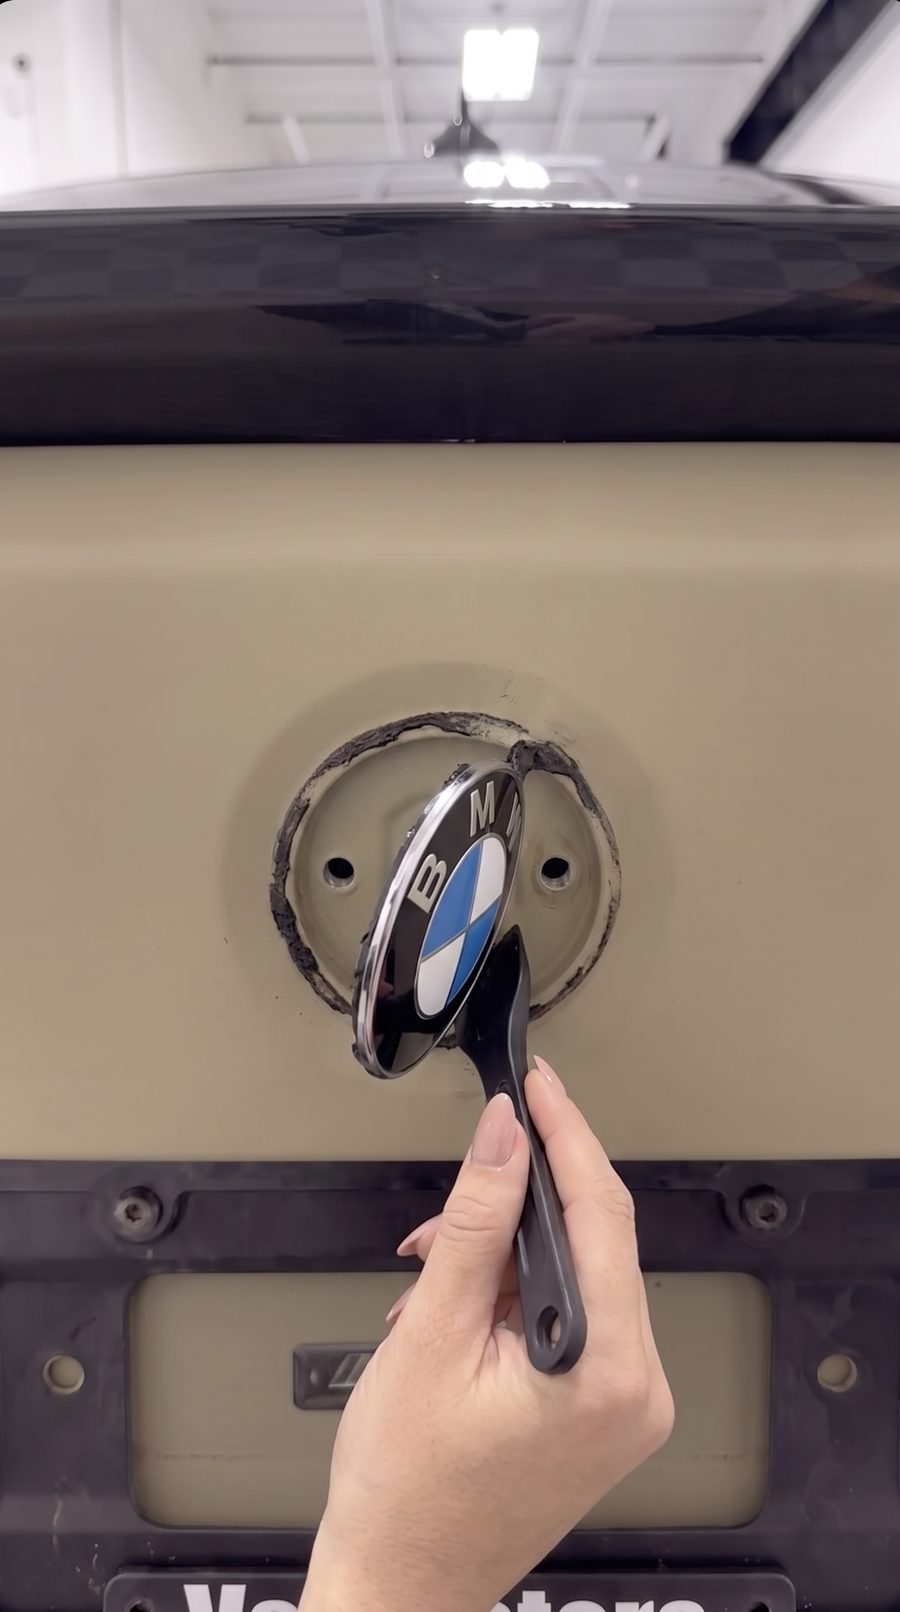
Warm and lift the roundel
Warm the factory badge with a hair dryer for about 60 seconds. Slide a plastic trim tool under the edge, then lift slowly and evenly.
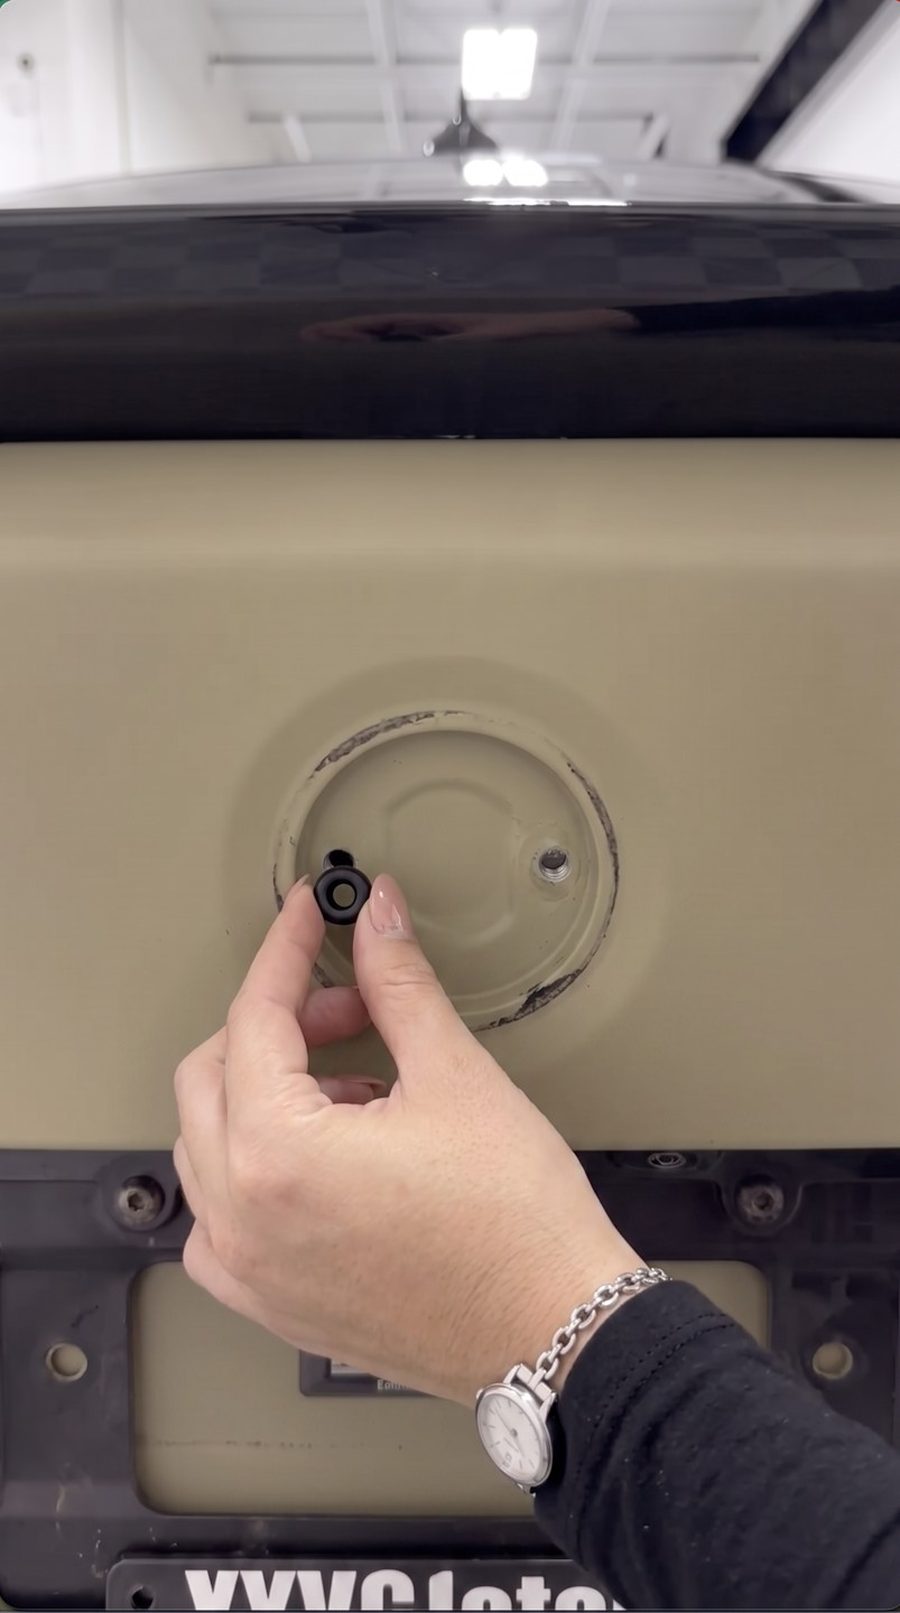
Remove both rubber grommets
Pull the rubber grommet out of each factory hole. Leave both holes open—HALO’s two wires pass through them, so you do not drill anything.
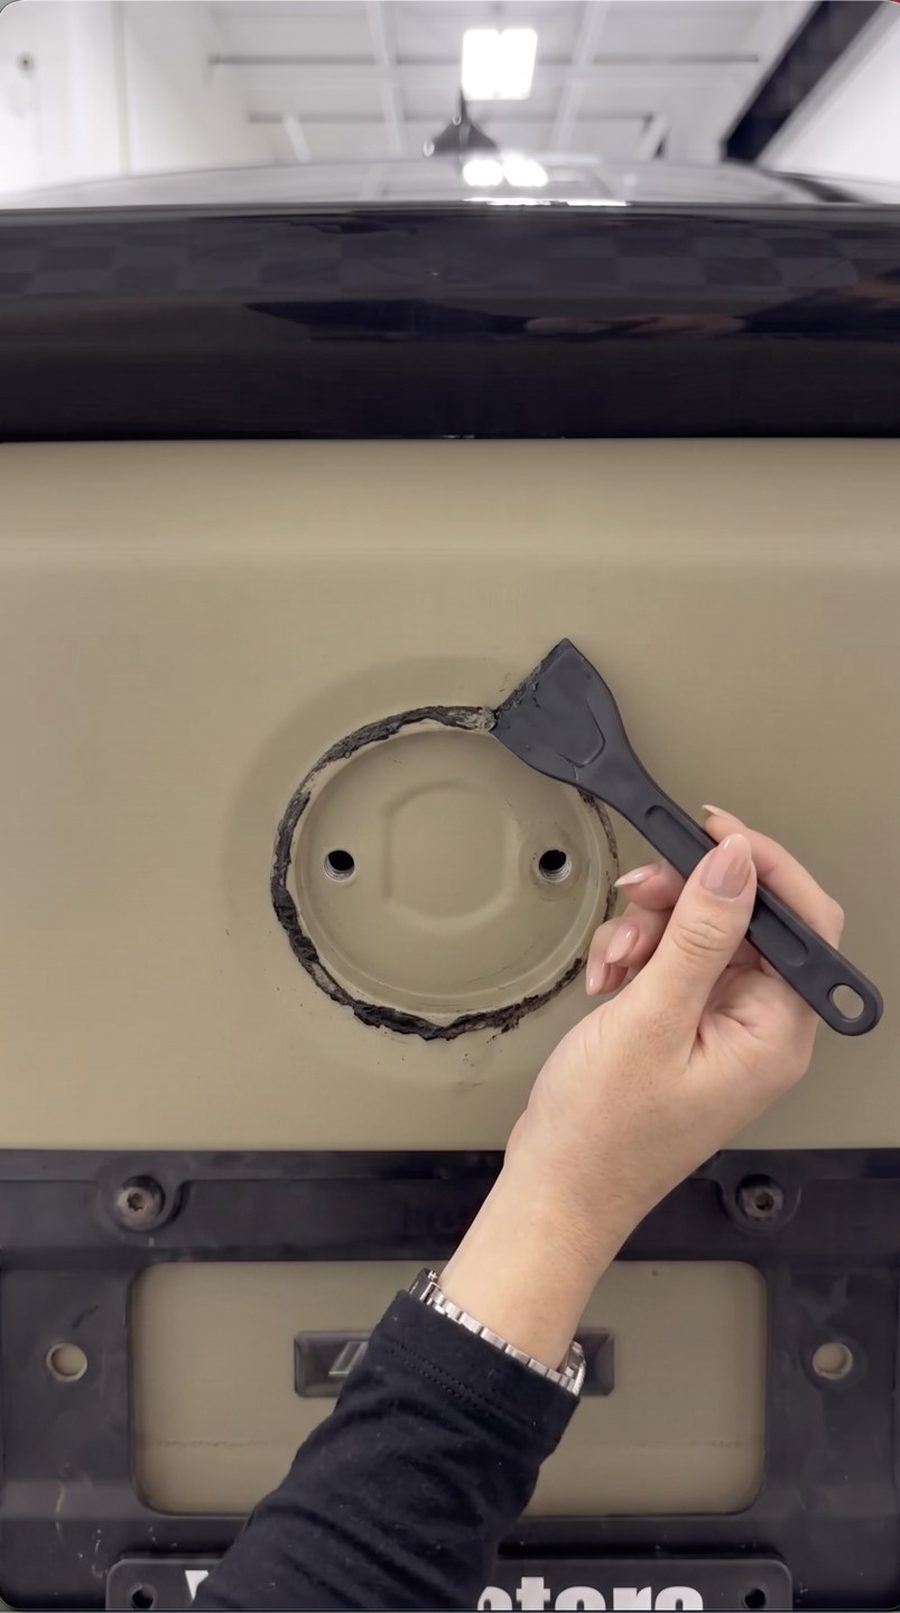
Clean and dry the recess
Remove all old adhesive, wipe the area with isopropyl alcohol, and let it dry completely. HALO must mount to a clean, flat surface.
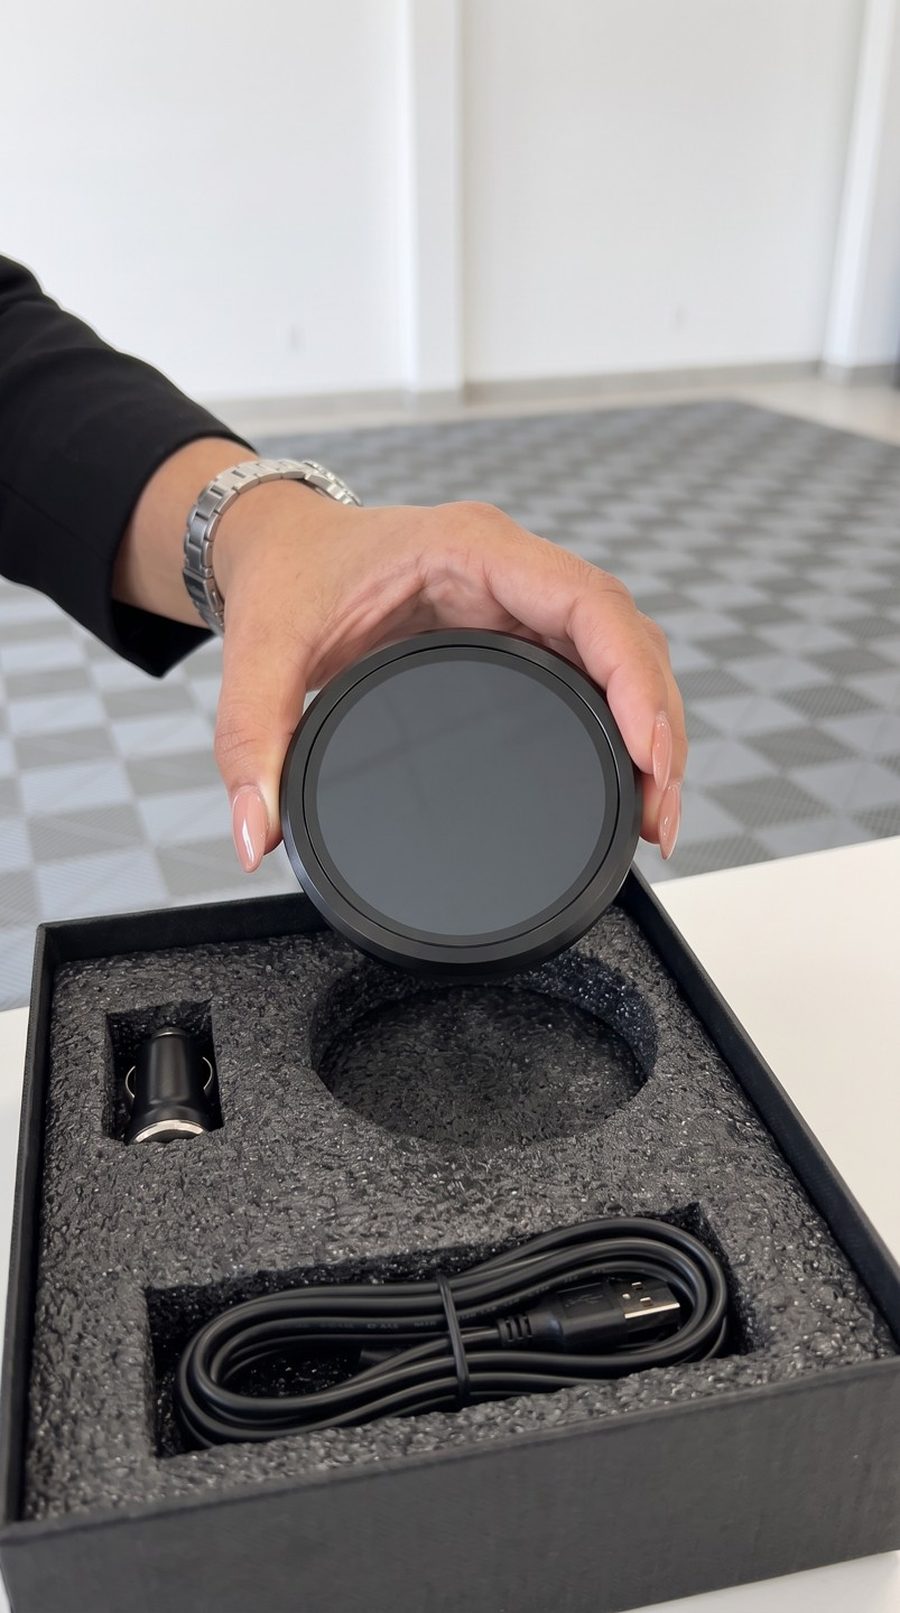
Lay out the included parts
Set out the HALO unit, supplied 12V adapter, long power cable, mounting ring, and mounting hardware. Do not press HALO onto the car yet.
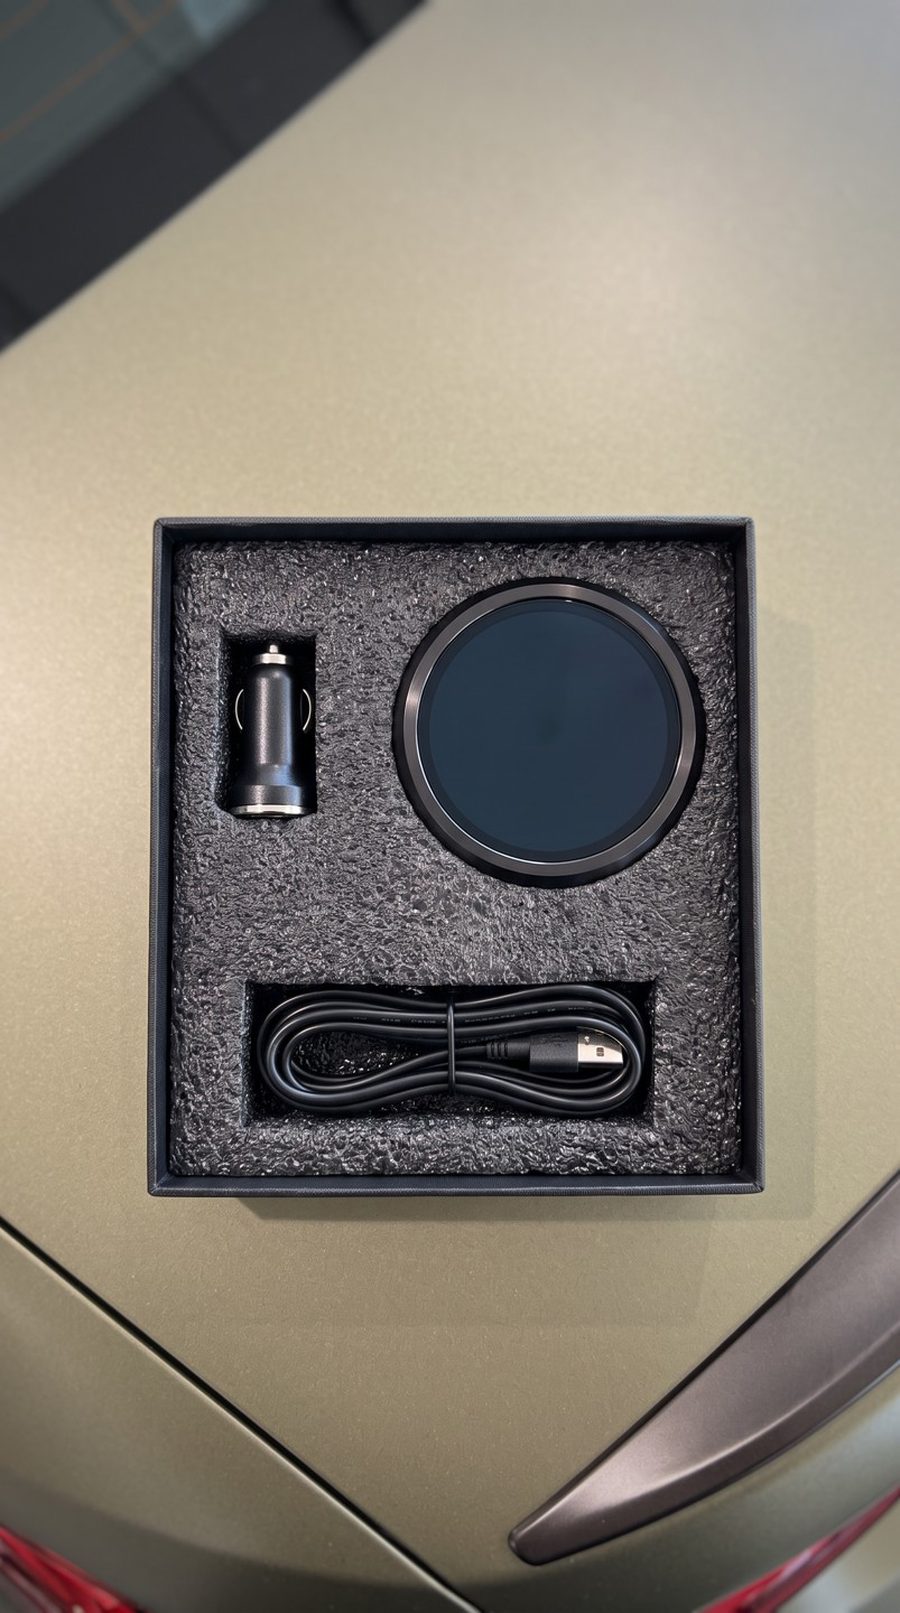
Inspect HALO
Check the screen, black bezel, mounting surface, and both wires for shipping damage before installation.
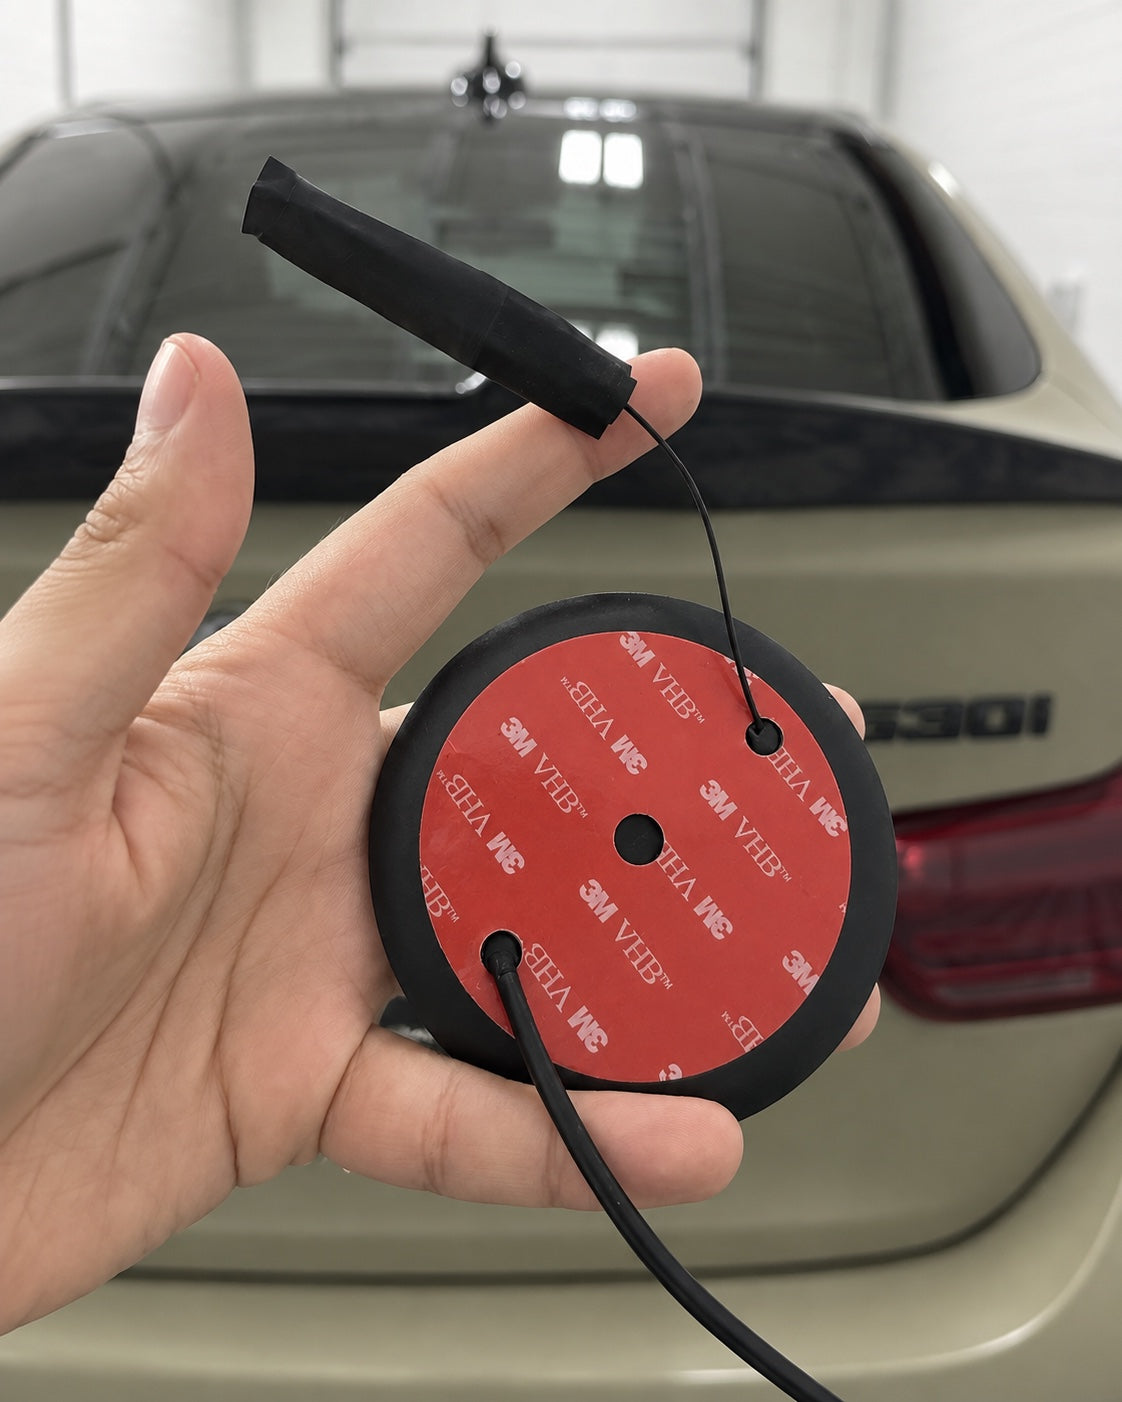
Identify the two wires
Flip HALO over before routing anything. The two wires have different jobs and go through different factory holes.
Viewed from behind the car, facing the trunk
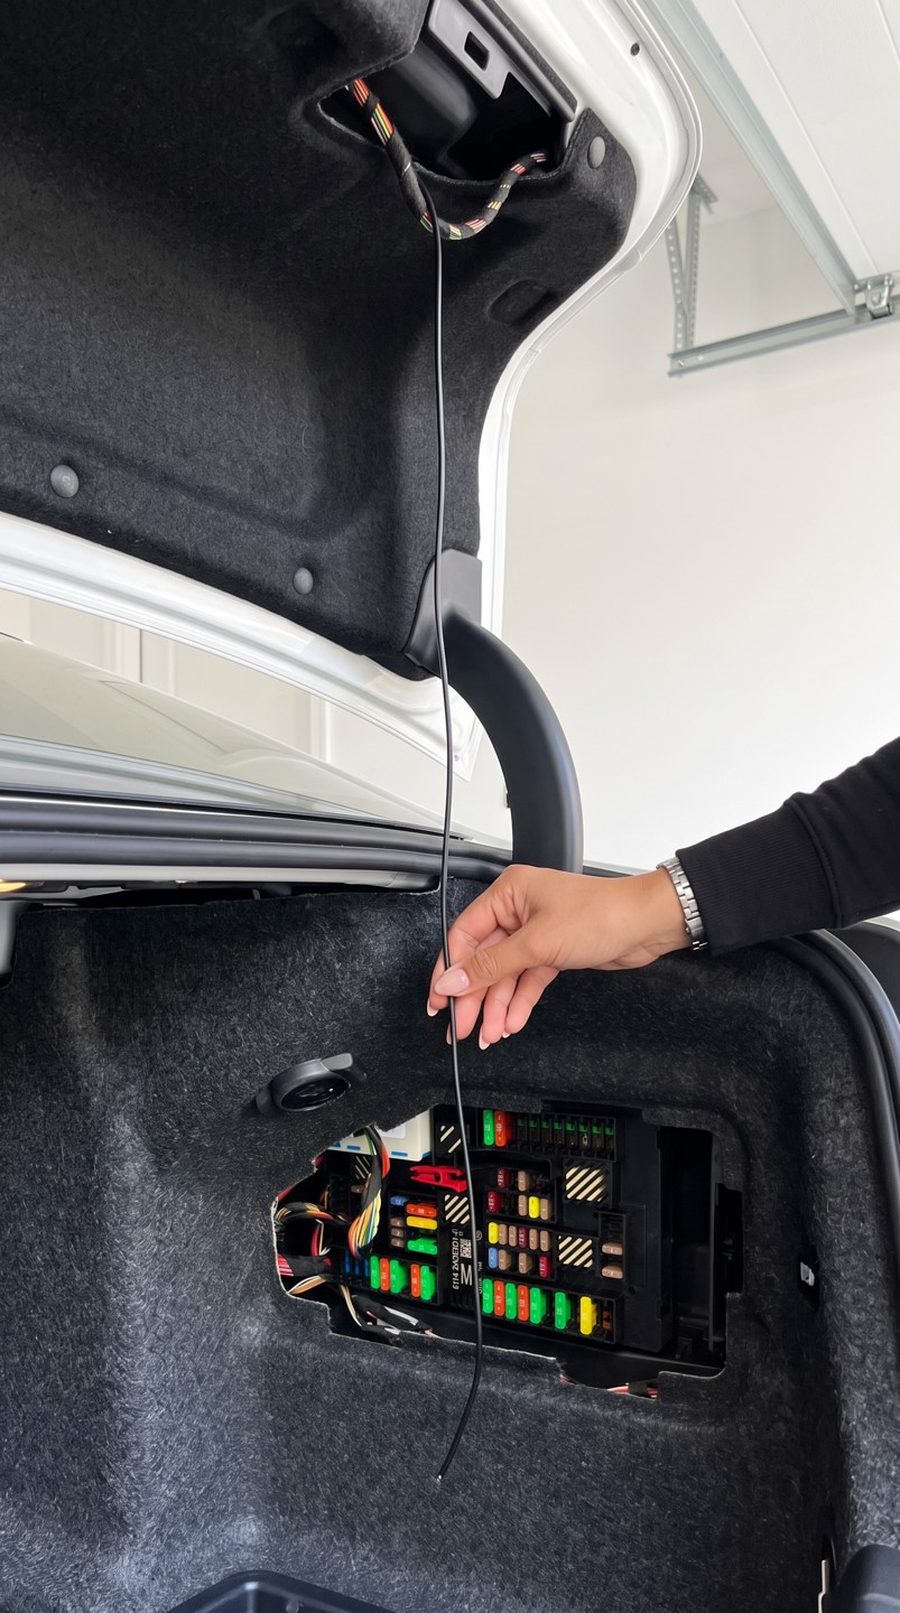
Feed each wire through its hole
Push the taped antenna through the right hole and leave it inside the trunk. Push the long black power cable through the left hole, then guide it down behind the trunk liner toward the power source.
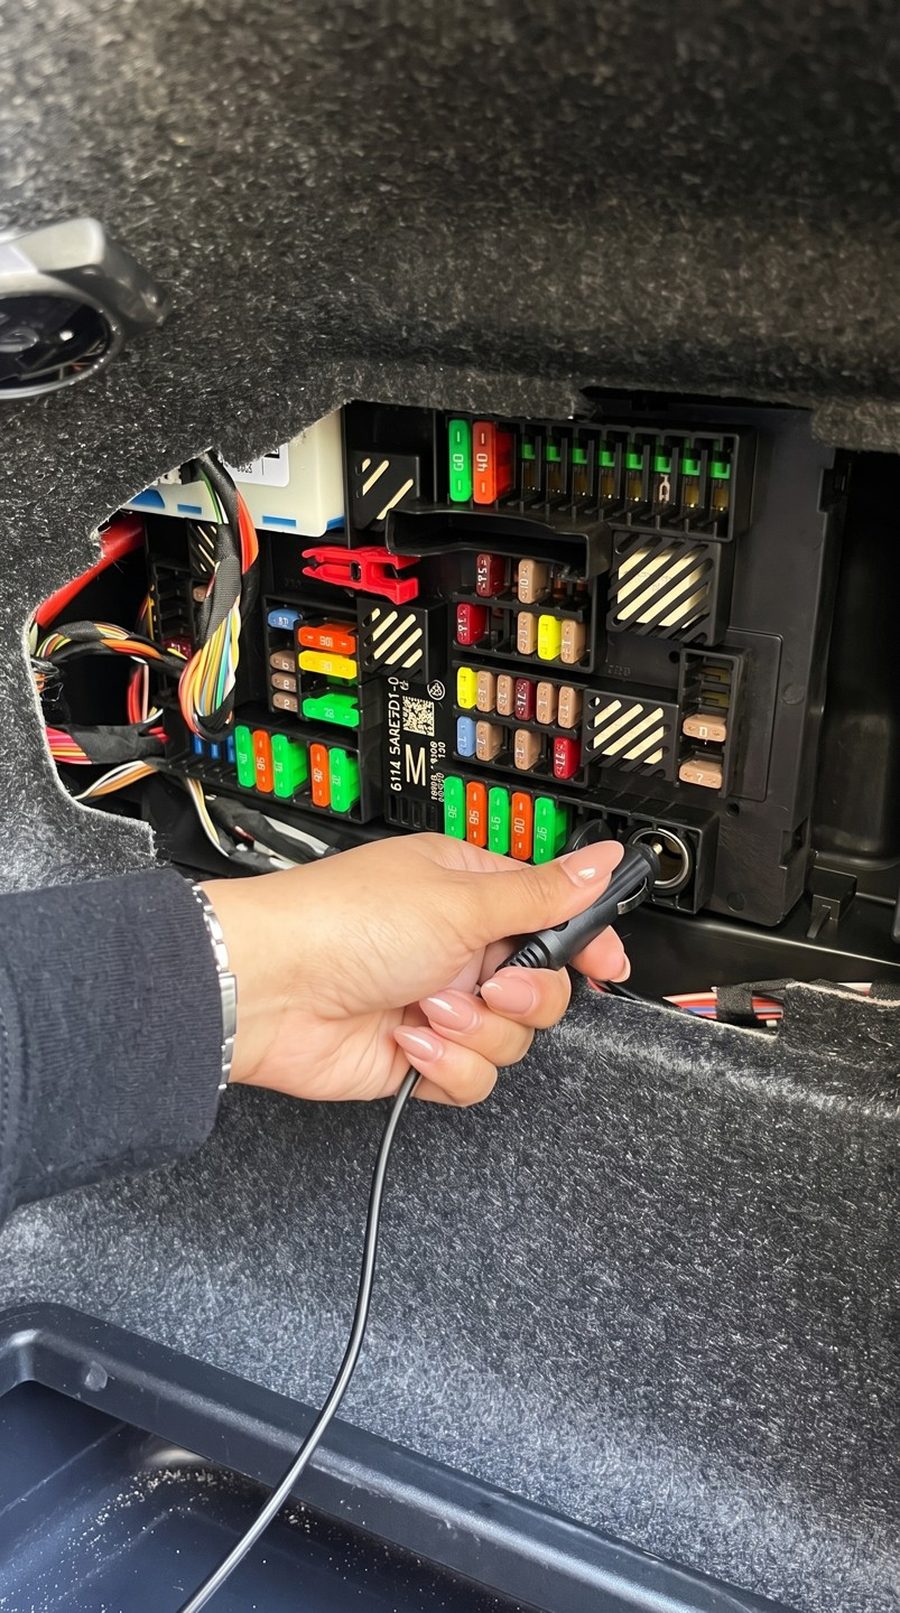
Plug in the power cable
If your trunk has a cigarette-style 12V socket, connect HALO’s supplied adapter and plug it in. Hide the remaining cable behind the trunk liner. If there is no socket, use the hardwire lookup below.
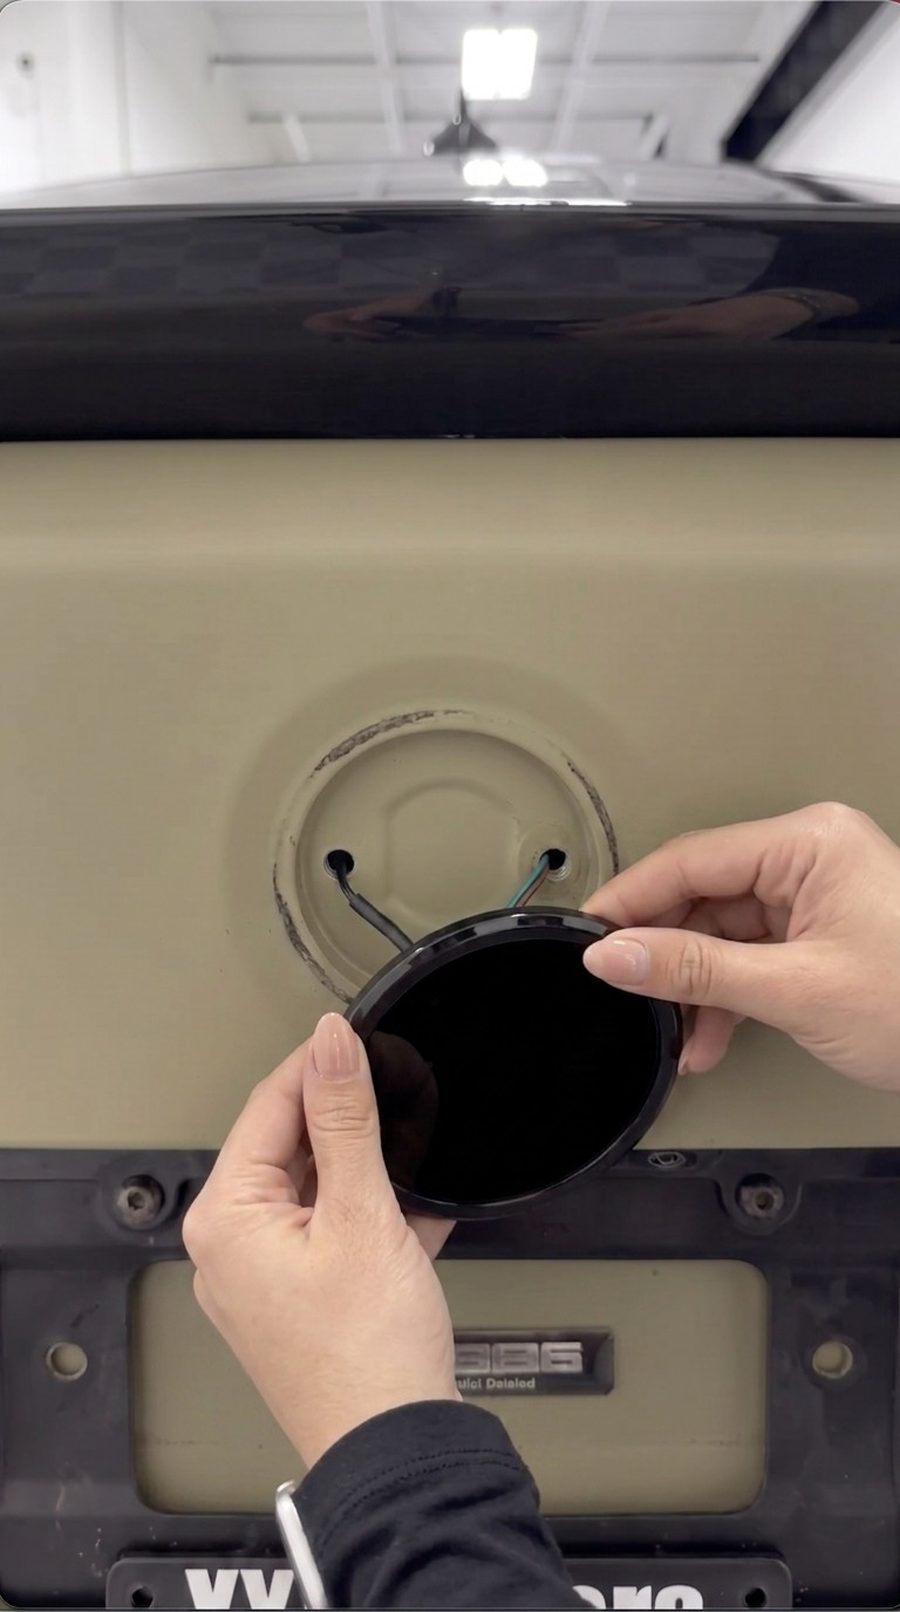
Align, mount, and press
Confirm neither wire is pinched. Center HALO in the badge recess, then press firmly and evenly for 30 seconds.
RevMode HALO · power
Power your HALO.
Use the trunk 12V socket whenever your BMW has one. If it does not, open the hardwire lookup for the exact trunk-side parts.
Plug into the trunk 12V socket
No extra power parts are needed. Plug in HALO’s supplied adapter, keep the cable inside the trunk, and hide it behind the trunk liner.
- 01Find the trunk 12V socket.
- 02Plug in HALO’s supplied adapter.
- 03Hide the cable behind the trunk liner.
Choose your BMW
Select the exact model generation and model-year range. We’ll show the trunk-side power hardware needed for HALO.
- HALO red → fuse tap’s 16 AWG crimp.
- HALO black → insulated M6 ring terminal → factory trunk chassis-ground stud.
The original vehicle fuse stays in the tap’s original-circuit slot. The new 5A fuse goes in the tap’s HALO/accessory slot. Everything stays inside the trunk.
Search or view the complete BMW power table
| BMW / years | Chassis | Trunk power point | Exact parts |
|---|
No matching rear-power result.
HALO software · phone setup
Connect. Open. Customize.
Once HALO is powered, connect your phone directly to the emblem and open the RevMode dashboard in your browser.The dashboard only connects after your phone joins the Wi-Fi network named HALO.
- 01Power HALO
Turn the vehicle’s accessory power on and wait for the HALO display to start.
- 02Join “HALO” Wi-Fi
Open your phone’s Wi-Fi settings and connect to the network named HALO.
- 03Open the dashboard
After Wi-Fi connects, open Safari or Chrome and go to app.revmode.co.
- 04Choose your design
Select or upload an image, video, or GIF, then apply it to the HALO display.
No app download required. Use Safari or Chrome on your phone.
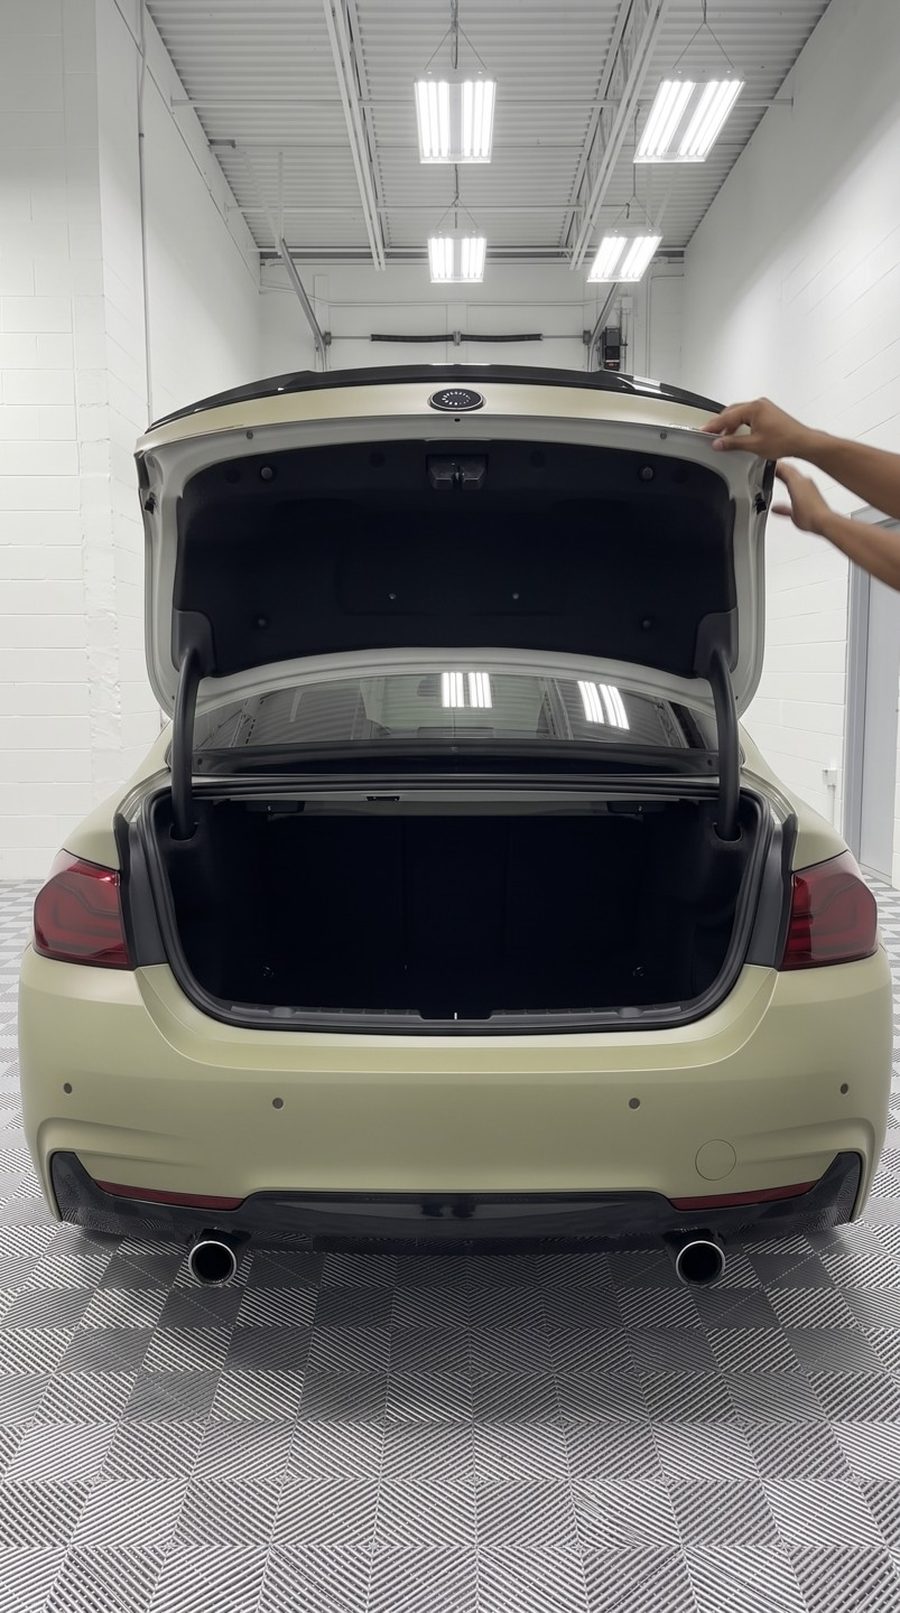
Reinstall the trunk liner
Tuck the power cable out of sight, make sure it is not pinched, reinstall the trunk liner, and close the trunk.
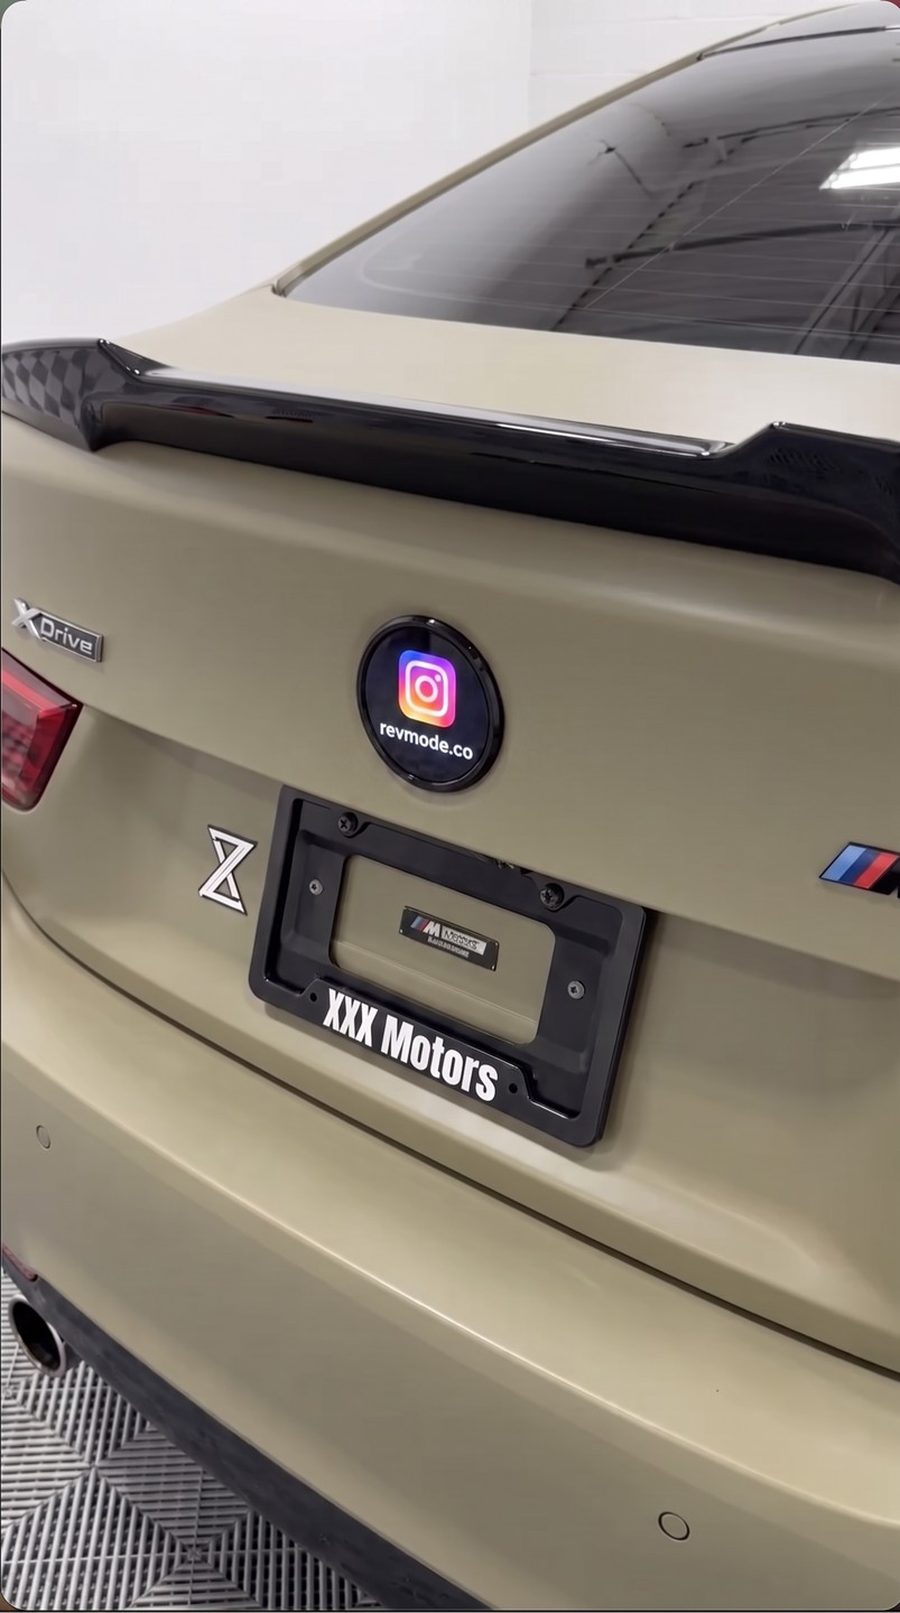
Run the final check
Turn on accessory power and confirm HALO displays the design you applied. Check that HALO is centered, the trunk closes normally, and no cable is visible or pinched.
That's it.
About 15 minutes, zero drilling, fully reversible. Available now from limited launch inventory.
Get HALO — $159.99 →